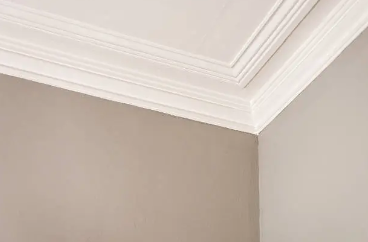
Adding crown molding to your home is one of the easiest ways to elevate a room’s appearance. It adds a polished, architectural detail that can make any space feel more finished and elegant. The good news is that DIY crown molding installation is entirely achievable, even for a beginner, with the right tools and approach. In this guide, I’ll walk you through the steps and share a few personal tips I’ve picked up along the way to help you install crown molding with confidence.
What You’ll Need
Before you get started, make sure you have the following tools and materials:
- Crown molding (pre-primed if possible)
- Miter saw
- Measuring tape
- Stud finder
- Pencil
- Hammer or brad nailer
- Finishing nails or brads
- Wood glue (optional)
- Caulk and caulk gun
- Sandpaper
- Paint or stain (if needed)
1. Measure the Room
The first step is to measure the room where you’ll be installing the crown molding. Measure along each wall and note down the exact lengths. Be sure to add a few extra inches to each piece of molding to account for cuts and mistakes.
Personal Tip: When measuring, I like to mark the exact length on the molding itself before cutting. It helps avoid confusion when you’re making multiple cuts.
2. Cut the Molding
Cutting crown molding can be tricky because of the angle it sits against the wall and ceiling. The key is to cut each piece at a 45-degree angle using a miter saw. This will allow the pieces to fit together seamlessly at the corners of the room.
- For inside corners, cut one piece of molding at 45 degrees with the longer edge against the ceiling. The second piece will be coped (or cut with a profile that matches the first piece) to create a perfect seam.
- For outside corners, cut both pieces at 45-degree angles but in the opposite direction to fit around the corner.
Pro Tip: Always practice your cuts on scrap pieces before moving on to the actual molding. It’s an easy way to avoid costly mistakes.
3. Find and Mark Studs
Once your pieces are cut, use a stud finder to locate the wall studs. Mark the studs with a pencil along the top of the wall where you’ll be nailing the molding. This will ensure your molding is securely fastened.
Personal Experience: I’ve found that using longer nails or a brad nailer works well for attaching molding directly into the studs, providing a more solid finish.
4. Dry Fit the Molding
Before you start nailing, it’s always a good idea to dry fit the pieces of molding to make sure they align properly. Place each piece where it will be installed and check that the angles fit snugly together.
5. Install the Molding
Begin installing your crown molding by working from one corner of the room to the next. Apply wood glue to the ends of each piece (optional but recommended) before nailing them into the studs. Use finishing nails or a brad nailer to secure the molding in place.
- Drive nails into the studs along the bottom edge of the molding.
- Be sure to check that the molding is level as you go.
Personal Experience: When I first started installing crown molding, I was overly cautious and only used nails. Now, I’ve found that a combination of wood glue and nails offers the most secure hold and minimizes the chances of gaps forming over time.
6. Caulk and Fill Gaps
Once the molding is in place, it’s time to caulk any gaps between the molding and the ceiling or wall. This step ensures a professional finish and hides any imperfections in your cuts.
- Use a caulking gun to apply a thin line of caulk along the top and bottom edges of the molding.
- Fill any nail holes with wood filler or spackle, and sand smooth once it’s dry.
Tip: Use a damp cloth to smooth the caulk as you go. This will create a clean, even line and prevent any excess caulk from drying on the wall.
7. Paint or Stain
After the caulk and wood filler have dried, sand any rough spots and paint or stain the molding to your desired finish. If you’ve used pre-primed molding, you’ll only need to apply a top coat of paint. If you haven’t, be sure to prime the molding first.
Pro Tip: I recommend painting the molding before installation for a cleaner finish. You can touch up any small areas afterward with a brush, but this approach saves a lot of hassle compared to painting it in place.
Final Thoughts
Installing crown molding is a rewarding DIY project that can significantly boost the visual appeal of a room. By following these steps and taking your time with the cuts and installation, you can achieve a professional-looking result on your own. With practice, you’ll find that the process becomes more intuitive, and your rooms will start to take on a more polished and cohesive look.
If you’re new to crown molding installation, don’t worry if your first attempt isn’t perfect. Learning how to handle the angles and cuts takes time, but once you get the hang of it, you’ll see how easily this project can transform your space.


